I am currently creating my very first “LINE stickers.”
About the LINE App
Ever since the LINE app came out many years ago, communicating with my family has become so much fun.
The LINE app is quite popular in Asian countries but not really in the U.S., though. When I asked my coworkers about it a few months ago, none of them had even heard of it. I assume people in the U.S. use other similar apps instead such as iMessage, WhatsApp, or Facebook Messenger.
However, I’m going to go ahead and make my own stickers today anyway!
LINE Sticker Creation
Image size
The required size for a LINE sticker is: 370 pixels (width) x 320 pixels (height). The image resolution should be 72 dpi or higher.
If the image size is already determined, it is best to set your canvas to those exact dimensions before you start working.
Many graphic design programs will prompt you to upgrade to a paid version once you try to resize your images. However, please note that the standard “Paint” app that comes with Windows can handle resizing. If you just need a quick adjustment, Paint is actually quite useful.
The AI Process
I believe it was my mistake that I prepared the image before setting up the canvas; I assumed I could just resize it later. However, if you are using software with AI generation capabilities, I think it is much better to prepare the image canvas first. If you have the image first, it just creates more work for you later, like resizing and other adjustments.
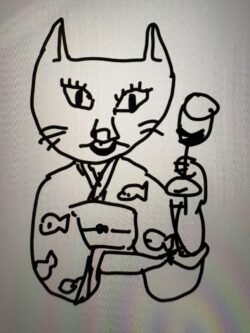
I took my drawing of a cat and asked the AI to modify it a bit. I used Google Gemini. Perhaps because I included the phrase “feeling like it’s saying ‘Good Job'” in the prompt, it generated the image with a speech bubble already attached.

You don’t see speech bubbles in LINE stickers very often, so I wasn’t sure if I should be happy that it saved me some effort or not… but I think I’ll try using it. I did a quick search and confirmed that speech bubbles are allowed. Good…
Making the Background Transparent (Removing the Background)
LINE sticker images must have a transparent background. There seem to be several sites that offer background removal. The first one I found was a site called Pixella, which claimed “100% free background removal” which sounds pretty good.
When I tried it, it removed the background quickly. However, when I went to download the transparent image file, it turned out I had to pay.
It’s a small amount and still a good deal, so many people might not mind and want to buy the plan.
When I was thinking about it, my daughter happened to walk by and told me, “There are sites that do that for free.”
So, I’m going to try one of those instead. That’s all for today.
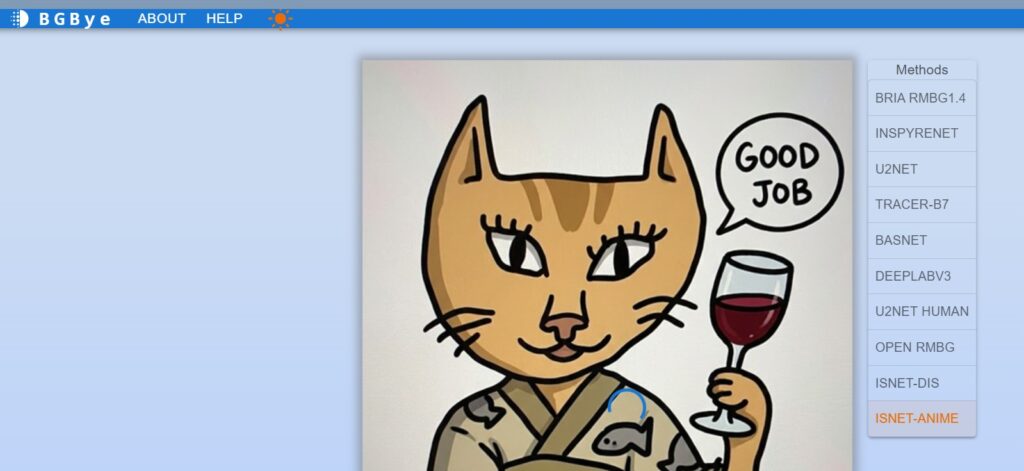
Background Remover Website
My daughter introduced one website that she used for her project last year. The website is BGBye.
According to my daughter, she was able to remove background on the website without any problem. However, on my Windows laptop, the site unfortunately did not work. My daughter’s PC has way higher spec.
You can see the blue loading circle image in the image below.
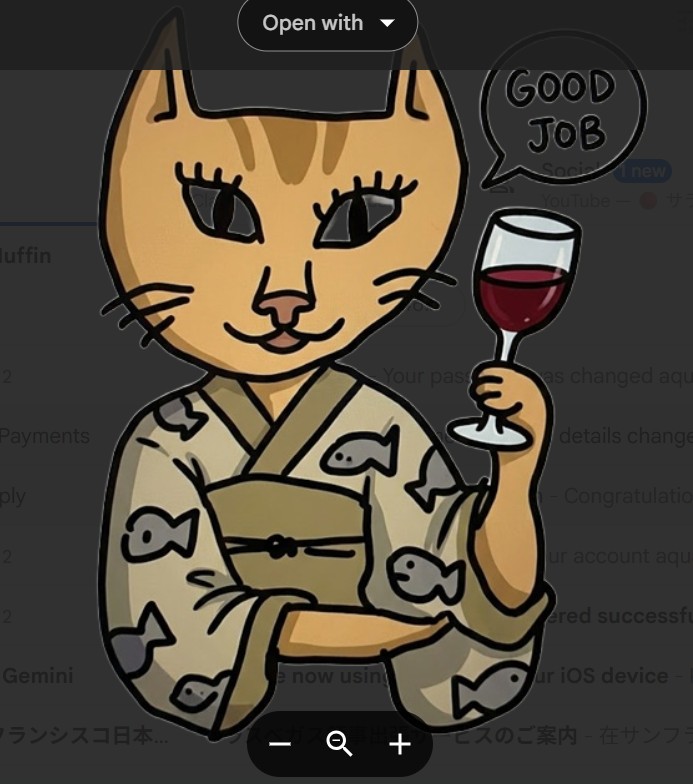
Another Background Remover
Next, my daughter tried to remove the background on her AI tool, “ComfyUI.” It took only 1-2 seconds and removed the background. Unfortunately, ComfyUI does not run on my laptop.
The background was removed. Wow, I did not realize that the eyes were not painted! Or.. the AI took did extra work?
Summary of the LINE Sticker Creation
- Size: 370 pixel (W) x 320 pixel
- Resolution: 72 dpi or above
- Remove the background (make the background transparent).
- Creating a LINE sticker set. LINE stickers are created in sets. You need to prepare them in counts of either 8, 16, 24, 32, or 40.
- Simply register as a new user on the “LINE Creators Market,” enter the detailed information for your stickers, upload the files, and you’re all set!